Project Category: Electrical
Join our presentation
About our project
Intravital imaging of live mouse heart presents a major challenge due to the excessive motion of the cardiac cycle. This severely compromises the spatial and temporal resolution of the images.
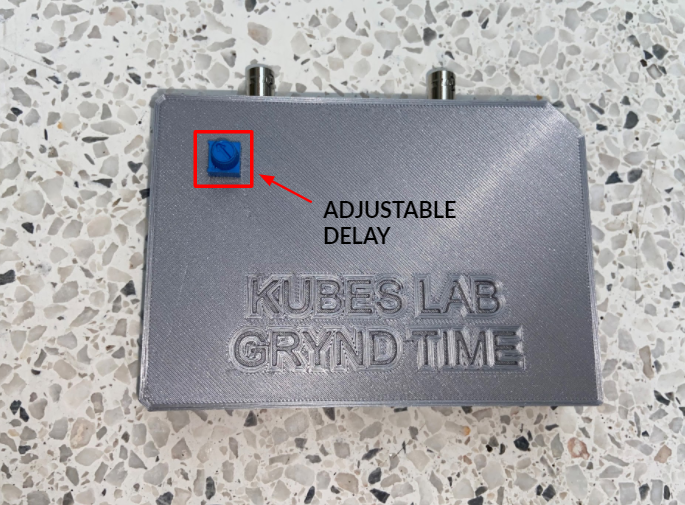
Our solution is a Pulse Oximeter-based triggering device that identifies specific parts of the cardiac cycle and acquires images during diastole, when the heart is most stable. The pulse oximeter produces a photoplethysmogram (PPG), which detects blood volume changes and as a result, gives information on the cardiac cycle. The PPG signal goes into the Arduino Uno board, which has a heartbeat detection system to detect systole, the start of a new cycle. The board then sends trigger pulses to the microscope to acquire images. Since every mouse has a different heart rate, the device has an adjustable 0-250 millisecond delay for finding the exact diastolic phase of the mouse. Following image acquisition, we use post-processing plug-ins on ImageJ to select the best frames.
This solution is an affordable and easy way to obtain 2D and 3D movies of the mouse heart with minimal motion artifacts. Our device is compatible with the MouseOx Pulse Oximeter and Leica SP8 microscope, but it can also be used for other microscopes as long as they have a triggering system. The total cost to create the device was under $100.00 + GST.
Meet our team members
Ganga Poudel
I’m a 4th year electrical and biomedical engineering student. My research interests include cancer based research and building biomedical devices for use in patients. I’ve enjoyed learning about biomedical imaging applications and this project was a great way to develop new skills and build upon my previous skills in biomedical device design.
Ritwik Sheel
I’m a 5th year electrical engineering student. I’ve learned a lot over my degree but some of my favourite courses and projects related to RF engineering and wireless communications. I joined this team as I felt the project would be a great way for me to apply those skills while also learning and acquiring skills related to the field of biomedical engineering.
Yarmaghan Afzal
I am a 4th year Electrical and Biomedical Engineering student. I was really interested in this project because I wanted to see the practical applications of my degree. I already have some experience analyzing MRI scans and interpreting electromyography recordings. I had a great time working with my team and further developing my skills!
Nathan Lipura
I am a fourth year electrical and computer engineering student with an interest in software development and system design. I joined this project to gain experience in the biomedical engineering space and to apply my knowledge in the biomedical field.
Daniel Schlosser
I’m a 4th year electrical engineering student. I enjoy working with signals and systems. This team and project allowed me to gain valuable experiences working and learning in the biomedical field.
Details about our design
HOW OUR DESIGN ADDRESSES PRACTICAL ISSUES
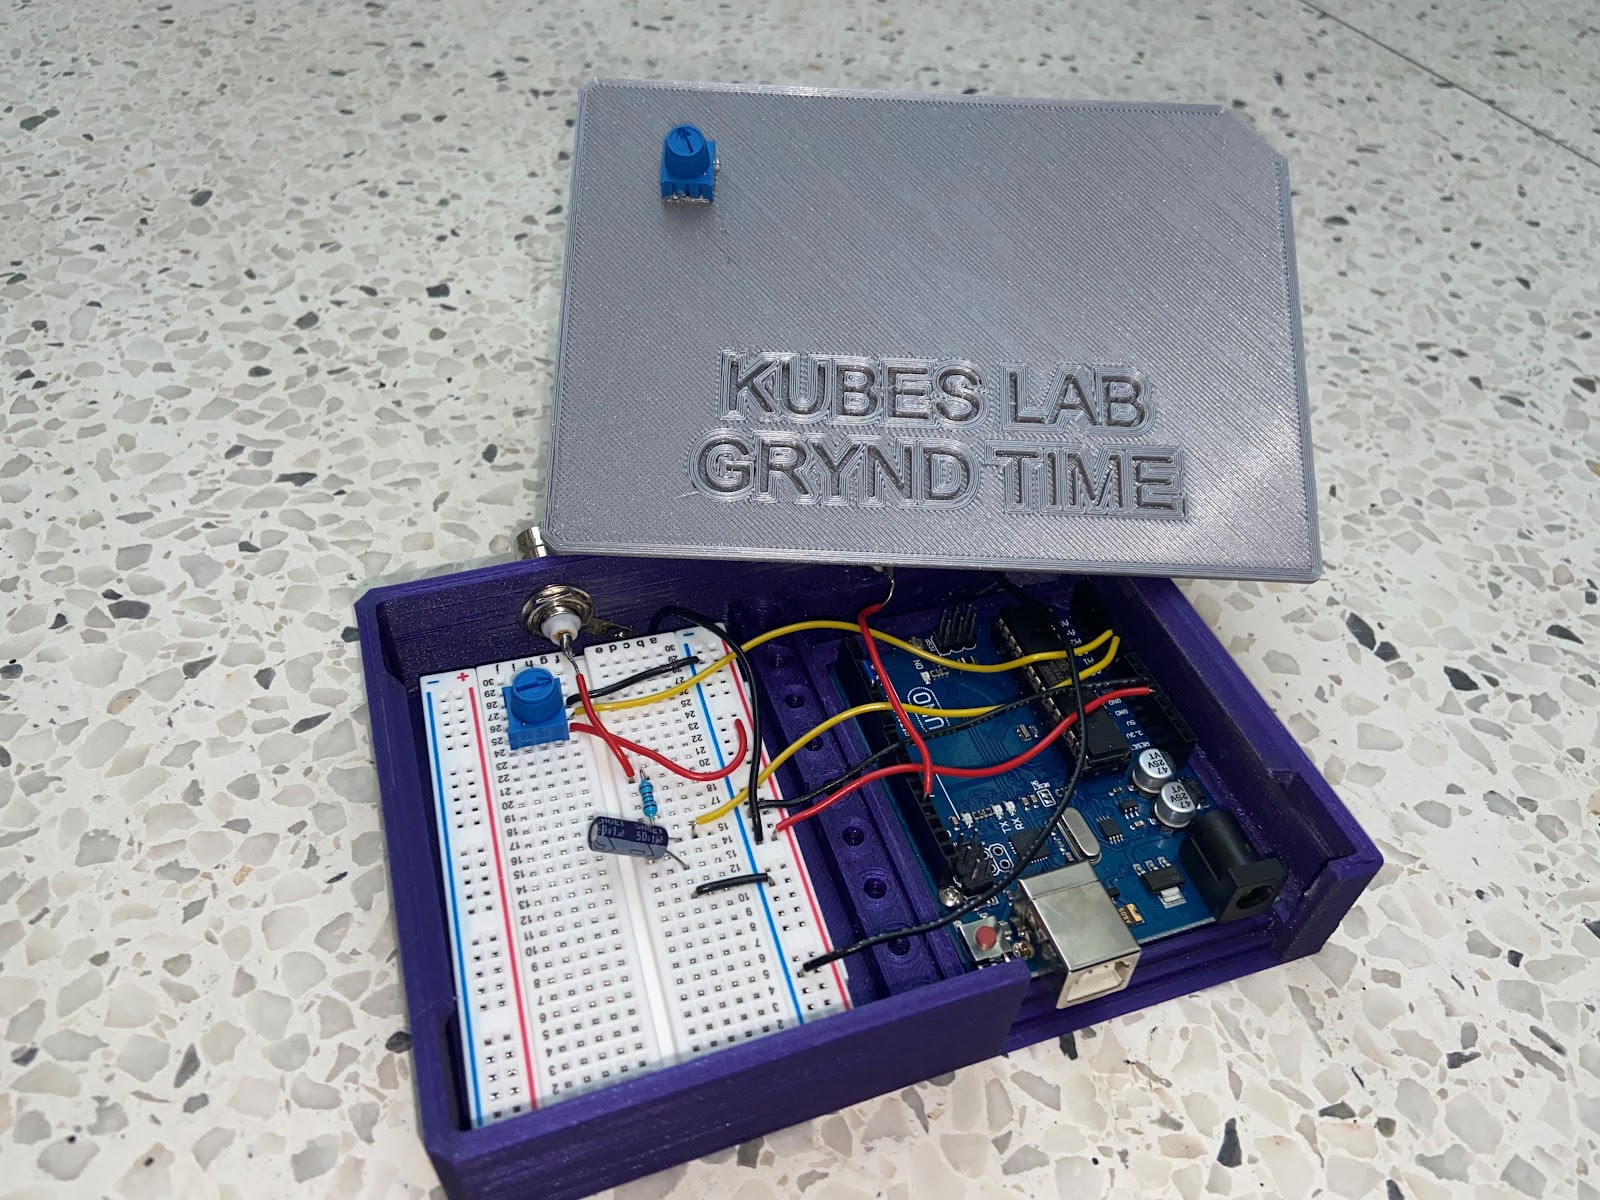
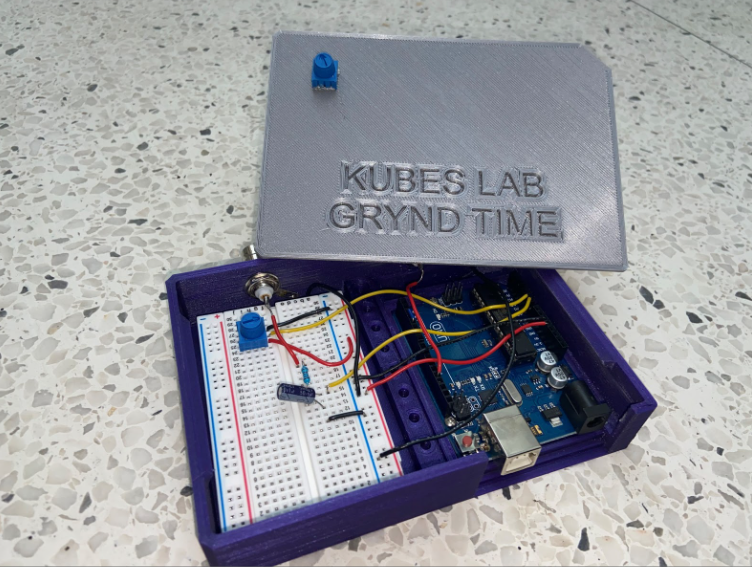
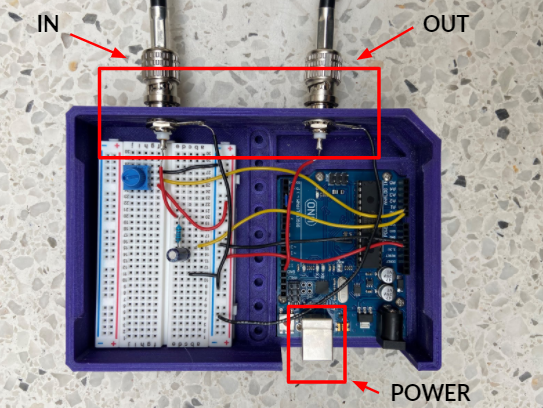
We took on the task of removing motion artifacts while imaging mice and tackled many problems from a technical standpoint. Our design accomplishes its requirements quite well, and every element is needed and provides some sort of purpose for the whole device. The set up is simple, it needs an Arduino Uno, a breadboard, basic lab components, and some good old software implementation. The device is fairly practical as there are only 3 components other than the Arduino that are needed. The MouseOx pulse oximeter output is filtered through a low-pass filter. The input is tracked using the Arduino and we wrote code that converts the analog input into a digital square wave. Moreover, to ensure that we are acquiring images properly at the right time (diastolic image acquisition), we incorporated a potentiometer that allows us to manipulate the time delay between the time systole is detected, and the trigger is output to the microscope. The simplistic design of the hardware, along with the complex Arduino code is what made this project so exciting for us. The best part is that the device only has two ports, an input and an output, which makes it easy to use and highly repeatable. Furthermore, we also wrote a user manual highlighting the step-by-step process of setting up and operating the device such that anyone can use it. It’s practical, feasible, and it works, and our team is proud we could accomplish what we did.
WHAT MAKES OUR DESIGN INNOVATIVE
The previously employed method to obtain images relied on physically restraining the heart using suction. This method delivered blurry images while also damaging the delicate tissues surrounding the heart. The concept of using pulse oximeter triggering to acquire images was inspired by another study [1]. They used this system to track leukocyte activity in the internal carotid arteries of mice. We expanded the idea so there are multiple physiological applications of the device. It can be used to acquire motion-artifact free images of the mouse heart and arteries located in other parts of the mouse. We did this by refining the adjustable delay feature of the device, so there is better control over detecting diastole during mouse heartbeat.
Moreover, Kubes Laboratory did not have a system for performing 3D imaging of mouse heart. We explored the Live Data Mode of the Leica software, which allowed us to set the z-slices and acquire z-stacks over time. Through this new mode, we were able to acquire 2D and 3D images simultaneously without worrying about synchronization issues.
WHAT MAKES OUR DESIGN SOLUTION EFFECTIVE
Prior to using our design solution, the untriggered images of the heart taken without using our device were blurry and contained motion blurs. Our design solution consisted of an arduino-based triggering system, which sent out a trigger pulse to take pictures when the heart is most stable. The triggered images of the heart were then produced with minimum motion artifacts and this feature of our design to take clear images makes our design solution effective.
In addition, our design effectively obtains the z position information of each slice for 3D images and this saves time when aligning these images into hyperstacks during the post processing. In post processing, the frame selection feature to obtain the best out of 3 images taken in the same z position and the frame registration feature to remove the residual motion artifacts further increases the effectiveness of our design to produce motion artifact-free movies or images of the heart.
From the biological standpoint, the motion artifact-free images produced from our design solution allows for the tracking of the immune cells and is considered effective in understanding the role of immune cells during a pathophysiological event of the heart.
HOW WE VALIDATED OUR DESIGN SOLUTION
We used several different methods for validation of our design. The first is using an image comparison algorithm known as Structural Similarity Index Measure (SSIM). This is based on perceived structural information within the images and the idea that pixels close together have dependencies on each other. A high SSIM score means the reference image is similar in its structural information to the other images.
The next method we used was a feature presence measure. This method involves finding a feature that is present in the reference image and measuring its dimensions. The next frames are then checked for the same feature. We can calculate the percentage of frames that share the same feature as compared to the total frames.
Finally, a visual comparison of the triggered and non-triggered images shows the stability provided by the triggering circuit as well as the post processing.
FEASIBILITY OF OUR DESIGN SOLUTION
To ensure our design was feasible, we developed our system with easy to find components while keeping the cost relatively low. The components used to process the pulse oximeter signal were purchased from a local electronics shop and the Arduino was purchased online. The enclosure that was designed to house the components was manufactured in the University of Calgary Makerspace Complex and is designed for easy use and transportation within Dr. Kubes’ lab. The total cost was under $100.00 + GST.
The tools we used for post-processing were open-source plugins for the ImageJ image processing program, which was already an industry standard tool [1]. To improve the usability of the system, a user manual is provided to assist users with setup and basic troubleshooting.
Partners and mentors

We had some great mentors during this project and would like to give them a special thank you!
Dr. Kubes gave us a great opportunity to put our skills to the test and solve a fairly complex problem, and provided guidance and support every step of the way. Dr. Deniset and Brian were instrumental members of our team and aided us during testing whenever we needed, especially with all the times we needed to get in contact with Leica about troubleshooting our design. Dr. Anderson was our academic advisor and we needed advice a lot. He helped us understand different details about the cardiac cycle early on and was available whenever we needed help. We really could not thank any of them enough for all the guidance and support they provided over the course of the year.
[1] S. McArdle, G. Chodaczek, N. Ray, and K. Ley, “Intravital live cell triggered imaging system reveals monocyte patrolling and macrophage migration in atherosclerotic arteries”, Journal of Biomedical Optics, vol. 20, no. 02, p. 1, 2015. Available: 10.1117/1.jbo.20.2.026005.
Our photo gallery
Results
The 2D movie on the left is obtained from the previous imaging method. The one on the right is after running our device with the delay set at 200 milliseconds. No post-processing is performed on the movies.


Here are the results after post-processing. The movie produced by our device (right) gives clearer, more stable images with minimal motion artifacts than the previous method (left).


